Consume Rest APIs
For some applications, it is required to consume third-party REST APIs to retrieve certain data, get the response, and transfer that API response to the end user interface.
Sometimes, you don't want to expose all the API data and you need only certain fields of the API response.
Here we'll show you the steps to either transform the whole API response or certain fields of the API response to the resource in your application easily using Twixor EnCaps.
1. Select Rest to consume third-party Rest API in your application.
2. Next, select the HTTP method from the list of available HTTP Verbs(GET, POST, PUT, and DELETE).
An API request allows you to contact with a server in order to do some action. These actions are termed as HTTP methods.
| GET | Method used to retrieve the data. It doesn't impose any other effect on that particular data. |
| POST | Send away the data to the server by means of HTML forms. |
| PUT | Replace an existing resource or data in the server |
| DELETE | Delete the data from the target resource specified by the request URI |
3. Enter the Request URI in the input field provided. Request URI refers the resource upon which the HTTP request is applied.
4. HTTP header fields are used to give the information regarding the HTTP Request or Response, or about the data sent in the message body.
Click the Header tab to provide the appropriate header fields for the API request. This will open a key-value editor. Give the Key and Value for the header manually in this editor.
Generally, there are four types of HTTP Headers.
General Header: This header can be used for describing both the request and response messages. Examples are Cache-Control, Transfer-Encoding, Trailer, Upgrade, etc.
Server Response-Header: This header is applicable to response messages alone. Age, Location, Etag, Set-Cookie are some examples of Server Response-Header.
Client Request-Header: Header fields like Accept, Accept-CharSet, Authorization, Cookie, etc. are for defining request messages.
Entity-Header: These headers describe the meta-data about the object's body or the resource denoted by the HTTP Request. Some frequently used entity headers are Content-Type, Content-Length, Content-Location, Content-Range, etc.
Provide the header based on the body of the HTTP request.
Info! For x-www-form-urlencoded body type, Twixor EnCaps voluntarily binds the suitable Content-Type header so that you don't want to set it manually. The Raw header is set automatically as soon as you provide the data format, for example, JSON.
HTTP Body Data
Select the body Content Type (x-www-form-urlencoded or Raw) while sending the form data as a POST Request.
Use x-form-www-urlencoded type if you want to provide simple text or ASCII information. You have to just type the list of keys and values in the key-value editor. Twixor EnCaps will cipher it the right way.
Here let's use a dummy REST API as an example to provide form-urlencoded data to create an employee.
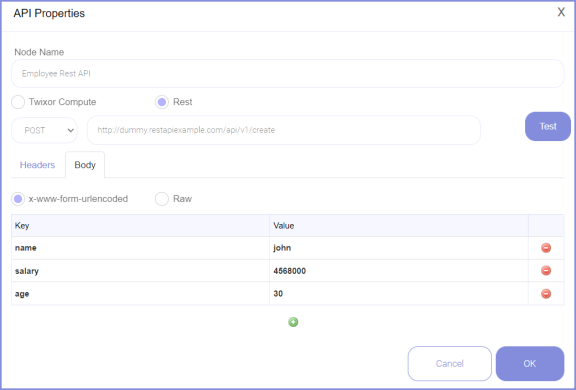
- Use the POST method and give the request URL.
- Select the x-www-form-urlencoded option to send plain text data to the Restful API server.
- Then, give the employee details (name, salary, age) in the Key-Value editor.
- Click Test to view the API response for this request.
Below shown is the API response for this POST request. An employee data is created and a unique employee id is returned in the response.
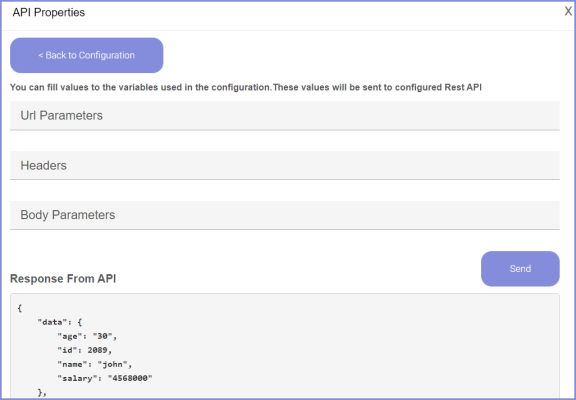
Here you also have the option to fill the values to the URL Parameters, Headers, and Body Parameters used in this request.
- To fill the values, enter the custom Variable Name within double curly braces in the key-value editor as shown below.
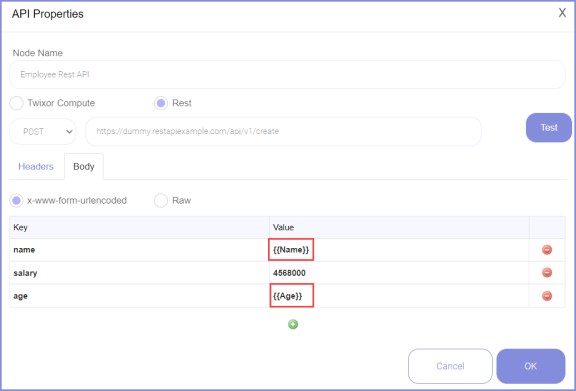
- Click Test to dynamically fill the values.
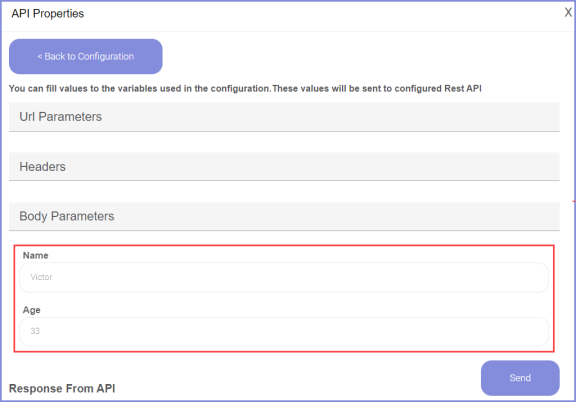
- Then hit Send to send these values to the configured Rest API.
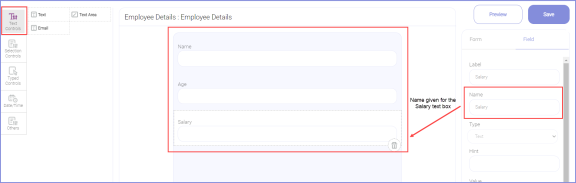
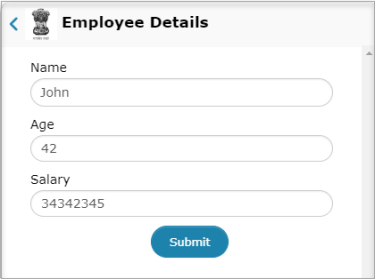
- You may also send away these values from EnCap Forms to the organized Rest API. To do this, create a form Employee Details with three text controls to get the name, age, and salary details of an employee.
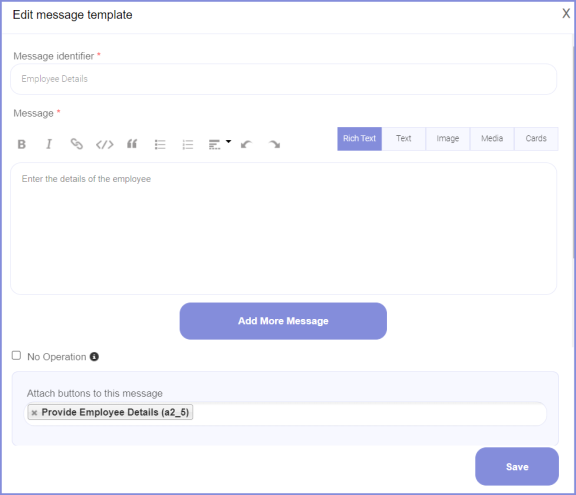
- Then create a new button namely Provide Employee Details of form button type to call the Employee Details form made by us.
- After creating the form and button, draft and place the message template before the API Node. And, don't forget to use the Provide Employee Details buttons in the message template to call the Employee Details form.
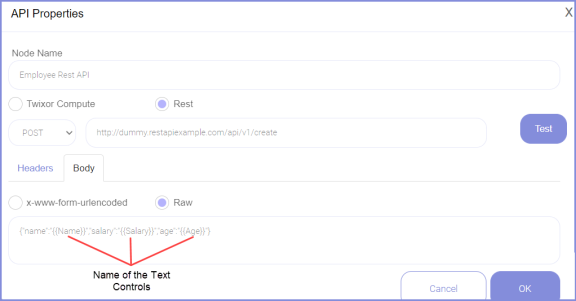
- Refer the Name of the text controls within double curly brackets while passing the body parameters for the Rest API as given below. For example, the name given for the Salary text box is Salary.
- We can then fetch and display the employee data created using the values given in the EnCap forms by employing another message template. Note that this message template will be placed next to the API node.
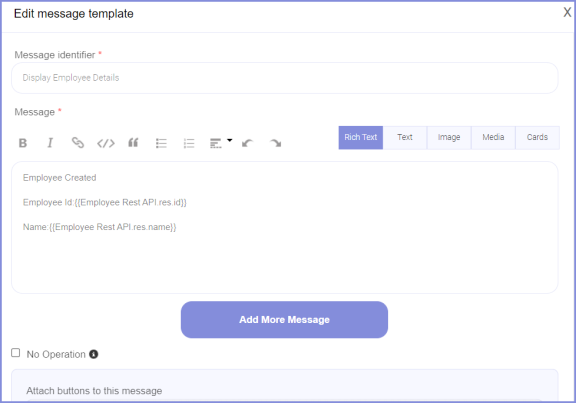
- In the message template shown above, use the format illustrated in Fetching and Displaying the fields of API Response section to retrieve and present the employee data.
Give the employee data in the EnCap Form as shown below:
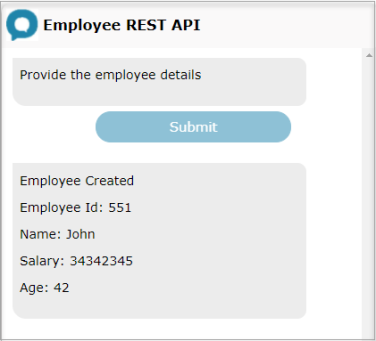
This employee data will be created and stored in the configured REST API server as shown below.
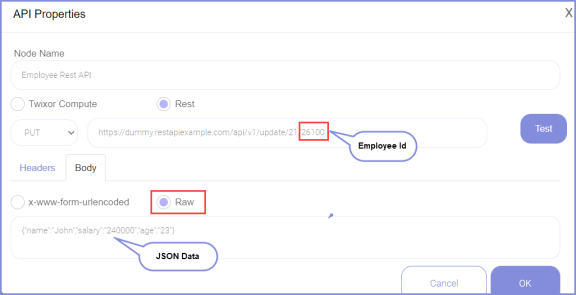
The Raw input contains almost any type of data like Plain Text, JSON, Javascript, XML, and HTML.
Let's update the details of an employee created by us using PUT method (By giving raw JSON input).
- Select PUT method and enter the Request URL.
- Give the Raw JSON data in the input editor to update the details of the employee.
REST API Request and Response Example:
Rest API Request:
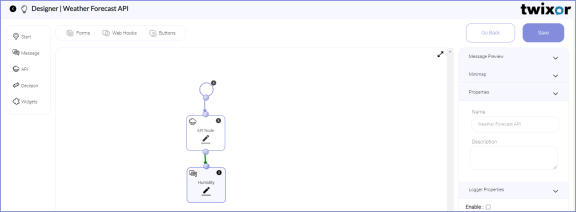
For illustration, let us make a call to a Weather API to fetch and display the weather forecast from API Response. For this purpose, create an EnCap called Weather Forecast API. Then drag and drop an API Node from the palette in EnCap Designer.
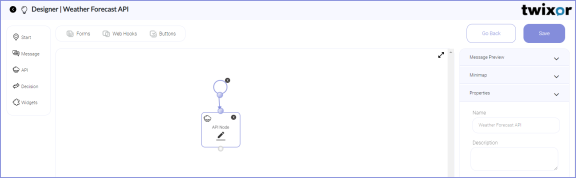
Then, configure the Rest API properties as given below:
- Give a name for the API node in Node Name. Let's give the API Node name as REST API.
- Select Rest option to access the Rest Resources.
- Select an HTTP method to perform the desired action on an acknowledged resource. In this example, choose the Get Method to retrieve the weather data.
- Type the unique identifier of the resource (URL) upon which the request is applied. Here provide the URL for fetching the weather data from Weather API.
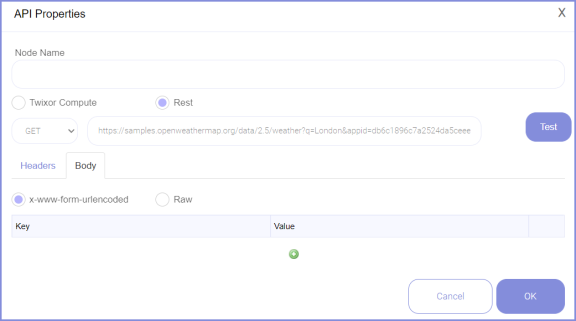
- Click OK to save the data.
- Click Test to test the rest API and view the response.
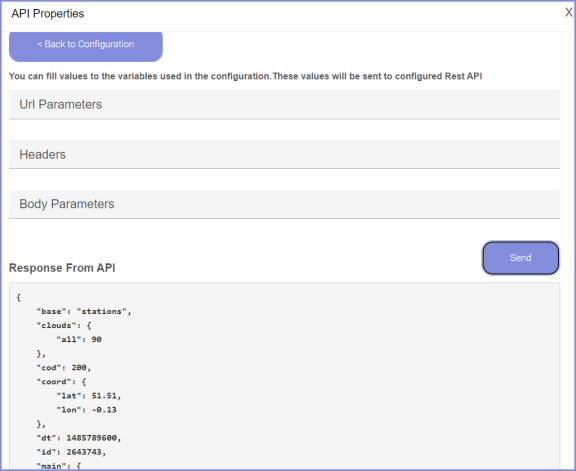
Rest API Response:
After hitting the Test button, you'll be able to view the API response for the request given.
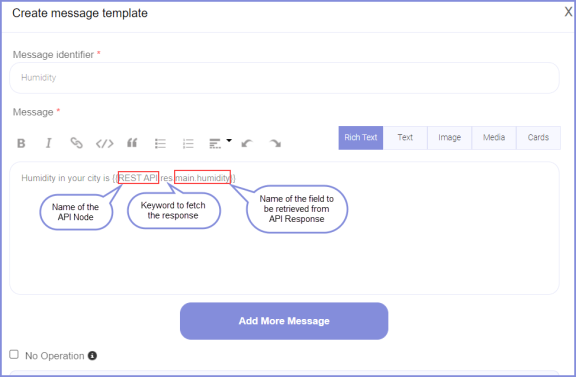
Fetching and Displaying the fields of API Response
You can display the data fetched from the API response in your EnCap message to the end user as shown below.
{{API Node Name.res.Field Name to be fetched from the API response}} is the tag for fetching the Response data from the Rest API server.
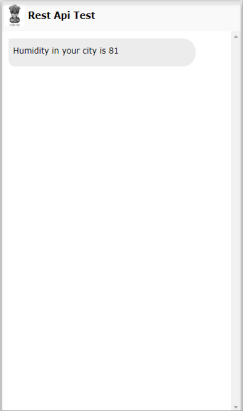
In this Weather API example, let's fetch and display the humidity data from the API response given above. For this, create a message template by dragging the Message node to display the humidity data.
Below shown is the output of the weather forecast API launch.